| Servings |
| 1half gallon |
|
|
- 1pound Bonesor more
- Waterenough to cover bones by one inch
- 1splash Apple cider vinegar
- Vegetables, herbs, spicesoptional
- 1teaspoon saltper quart
- Roast at least 1 lb of frozen bones at 425 F for about 20 minutes, until browned.
- Put bones in a slow cooker then fill with filtered water.
- Add a splash of apple cider vinegar, preferably organic, or lemon juice.
- Cook on LOW for 12-24 hours for chicken bones, and 24-36 hours for larger bones, such as beef bones.
- As the bones cook, skim the fat and scum off the top. More often in the beginning, but every few hours throughout (don’t worry about it overnight).
- The last couple hours of cooking add organic veggie scraps, herbs, and spices.
- Strain the solids out of broth. It will keep in the fridge about 5 days, adding a teaspoon of salt per quart of broth will help it stay fresh longer. If you aren’t going to consume the broth in the next week, freeze it.
How to make (Caribou) Bone Broth
While you may only recently been learning about bone broth and its benefits, bone “broth” is nothing new. Traditional cultures all over the world have been making it for many, many years. Chefs call it stock (and don’t cook it long enough, in my opinion) and use it as a crucial ingredient to add flavor and viscosity to soups, stews, and sauces. Here’s how I make my broth.
1. Roast at least 1 lb of frozen bones in a glass baking dish at 425 F for about 20 minutes until browned. The more bones the better, but don’t stress over it or put so many bones in that you can’t cover them with at least an inch of water when you move them to your slow cooker in the next step. You can generally make more than one batch of broth if you are using bigger bones. I was amazed by how many batches I got out of the caribou bones. Typically, I make one batch for my family, then a second for my dog. With the game bones, I was able to make THREE batches for my family and one for my dog. Well worth the trade with my friend!
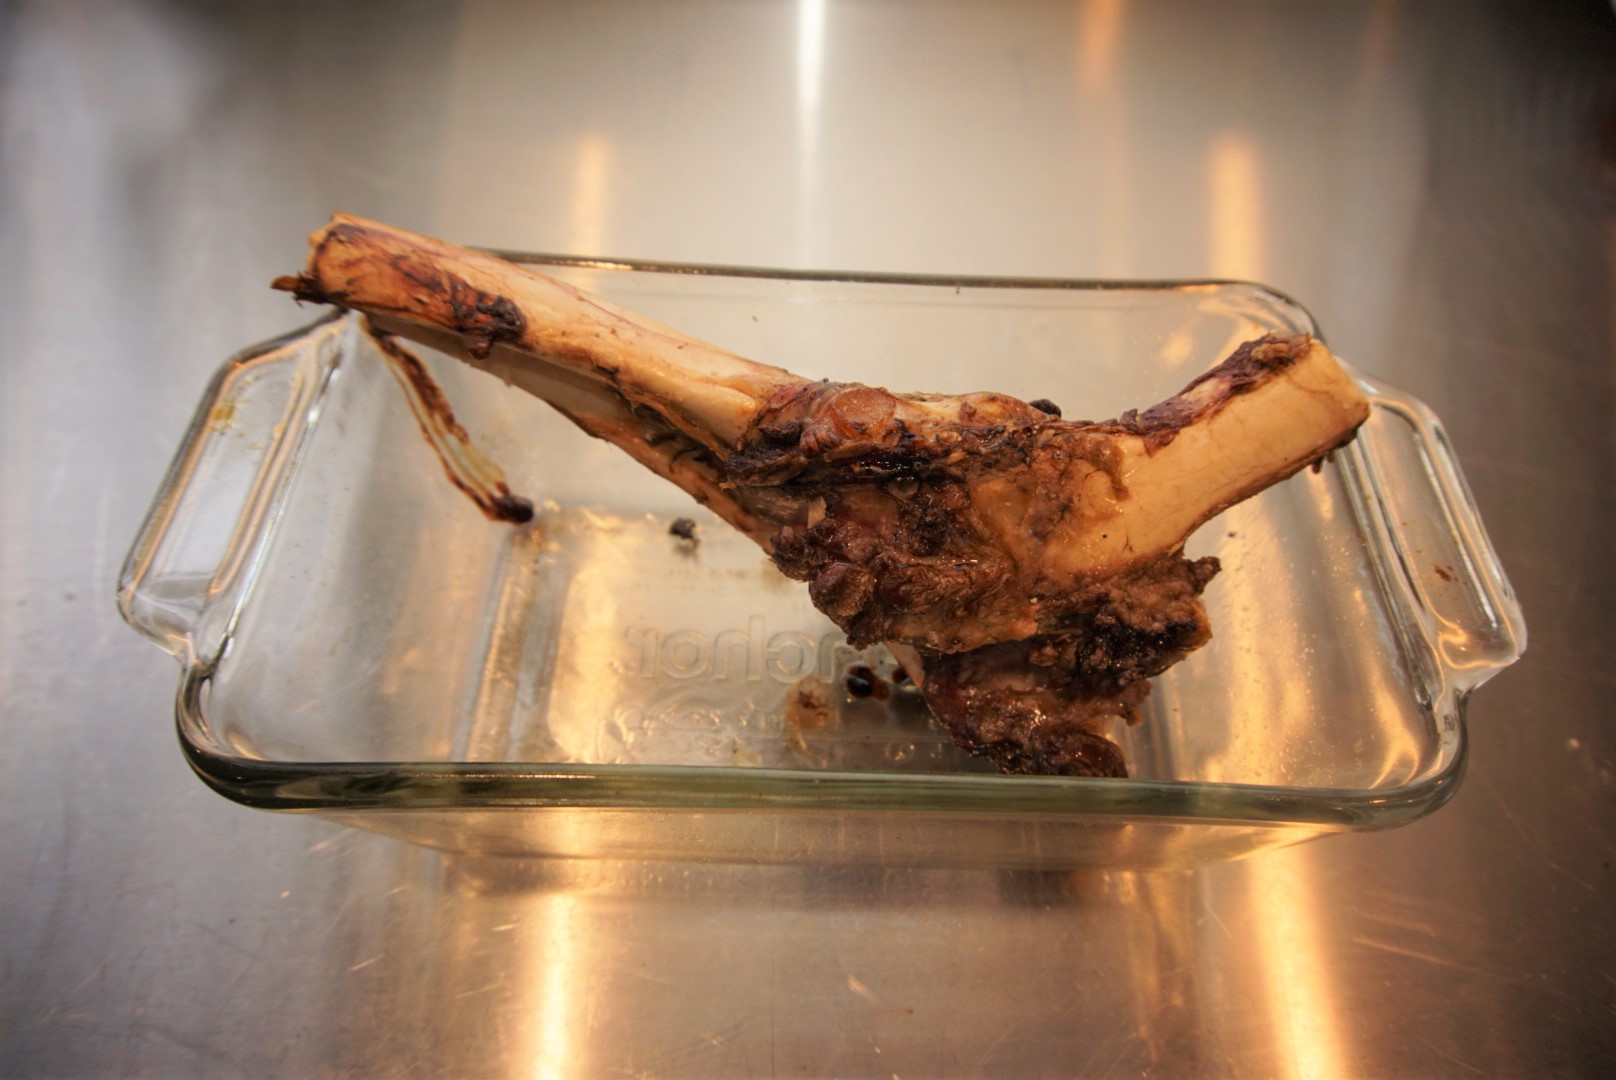
Roasting the bones is purely for flavor. Make sure your bones are nice and browned, but not burnt. After baking, liquid may have accumulated in the bottom of your baking dish. If you would like, you can pour this liquid into a heat-proof glass container and let set. Once the fat has risen to the top, discard this and add the remaining liquid to your slow-cooker.
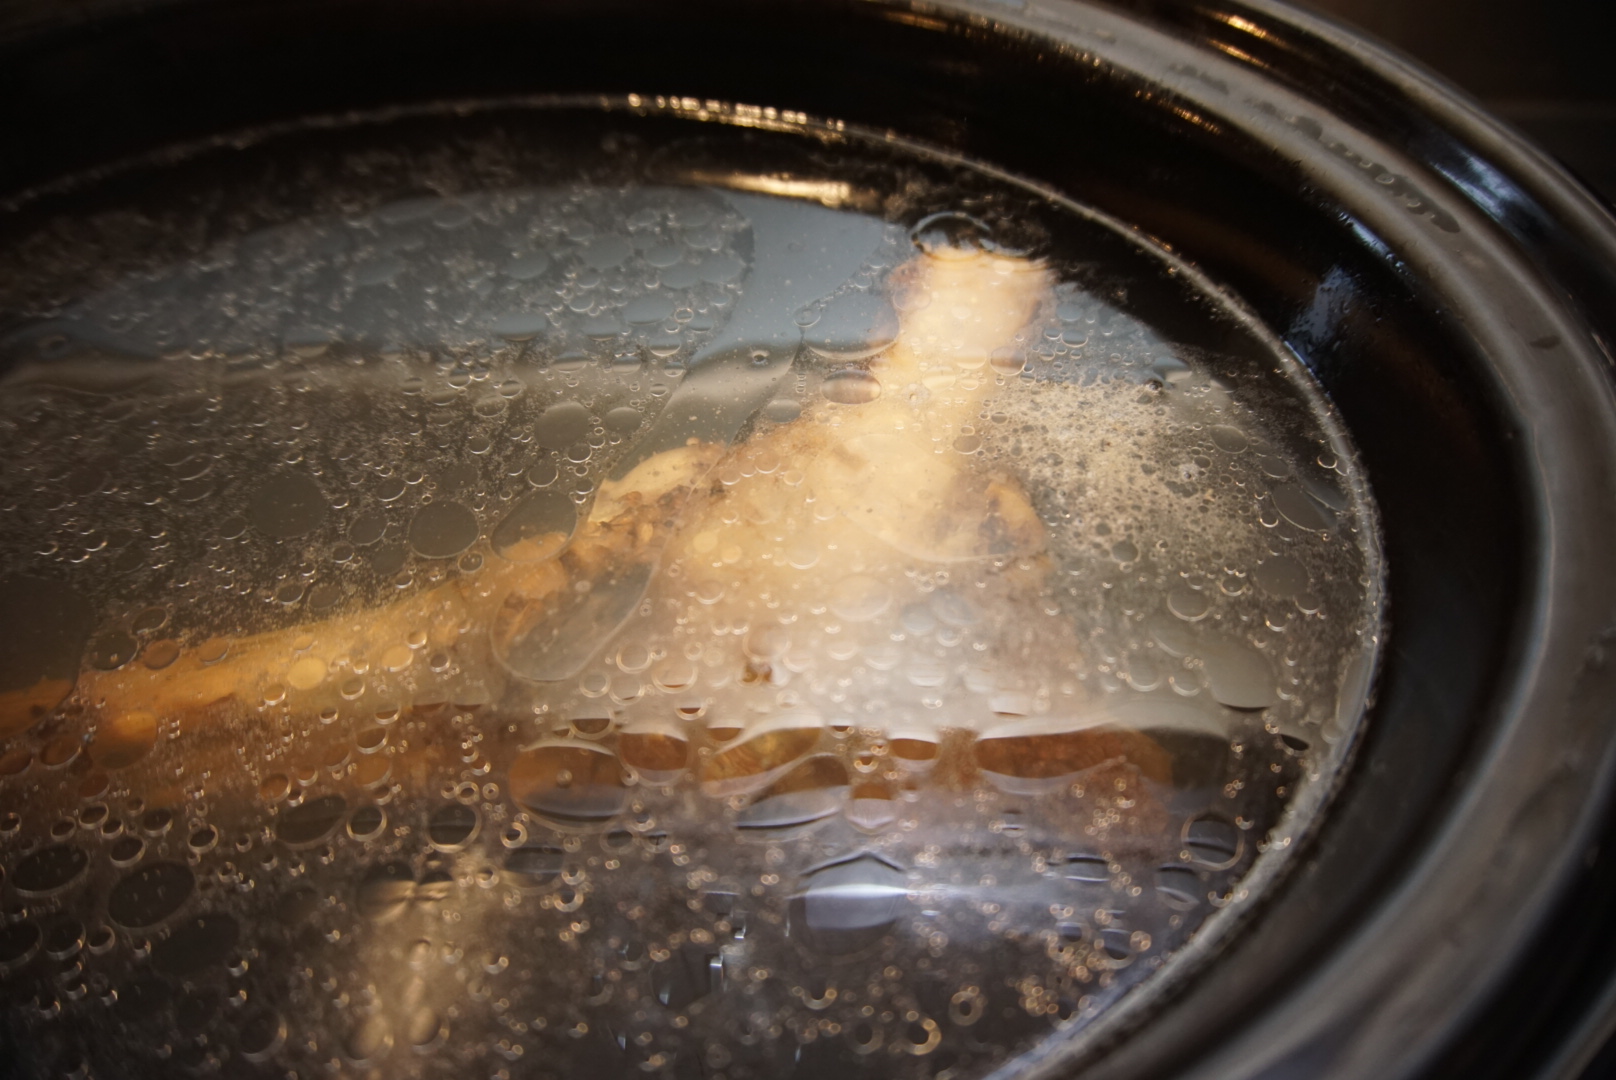
2. Put bones in a slow-cooker and then cover them with water. Make sure if you are using tap water to run it through a filter first. I used this filter before I moved to a house with a well. Cooking with and drinking filtered water or well water is important because the water you use greatly impacts the flavor of whatever your cooking. Unfiltered tap water may also contain things that you don’t necessarily want to consume, like excess chlorine which can be hard on the good bacteria found in your gut. I used this filter before we moved to a house with a well.

3. Add a splash of vinegar, preferably organic apple cider vinegar, or you can substitute with lemon juice. Adding acidity allows more nutrients like calcium and magnesium to be released from the bones into your water. Here is a PubMed study to prove it 😉 The study also looked at heavy metals in bone broth. While the study found bone broth to contain safe levels of heavy metals, less is always better. Animals that are fattened up in feedlots can be exposed to more heavy metals. If you source your bone from the right place this is even less of a concern.
4.Cook the bones, water, and vinegar or lemon juice on LOW. If you’re using chicken bones, you will want to cook them for 12-24 hours, and for larger bones like caribou or beef bones, you will want to cook for at least 24-36 hours. As the bones cook, skim the fat and scum off the top. Do it more often in the beginning, and aim for every few hours throughout the cooking process (don’t worry about it overnight though). If you skip the skimming, I have found that your broth will taste funky. Trust me on this one. The caribou bone didn’t scum up very much, you may see more white foam at the surface of your broth.
Flavoring Your Broth
5.Flavoring the broth is optional, but I like to add herbs and spices as well as organic veggie scraps, skins, stems that I have saved from cooking other dishes throughout the week and stored in my freezer. I don’t want to sound like a broken record, but organic is important. Things that are good in broth include, but are not limited to: carrots, celery, mushrooms, onions (and the skins or onion brûlée), herbs, ginger, peppercorns, bay leaves, allspice berries, lemon peel, garlic, etc. Don’t be afraid to get creative with the flavorings! If you add the veggies and spices to your broth at the beginning, the long cooking time will overcook them and the resulting broth will be less flavorful, so be patient and wait to add flavorings until the last couple of hours of cook time. You can also leave it plain, which is a fine option if you are going to simply be cooking with it (vs. sipping it alone).
Storing Your Broth
6.You can tell your bones have given you all they can when you can cut them with a butter knife. To store your broth, you will want to strain out the solids. These are the strainers I wish I had. I recommend storing it in glass mason jars (I typically use a quart or a half gallon). Your broth will keep in the fridge about five days, but adding a teaspoon of salt per quart of broth will help it stay fresh longer.
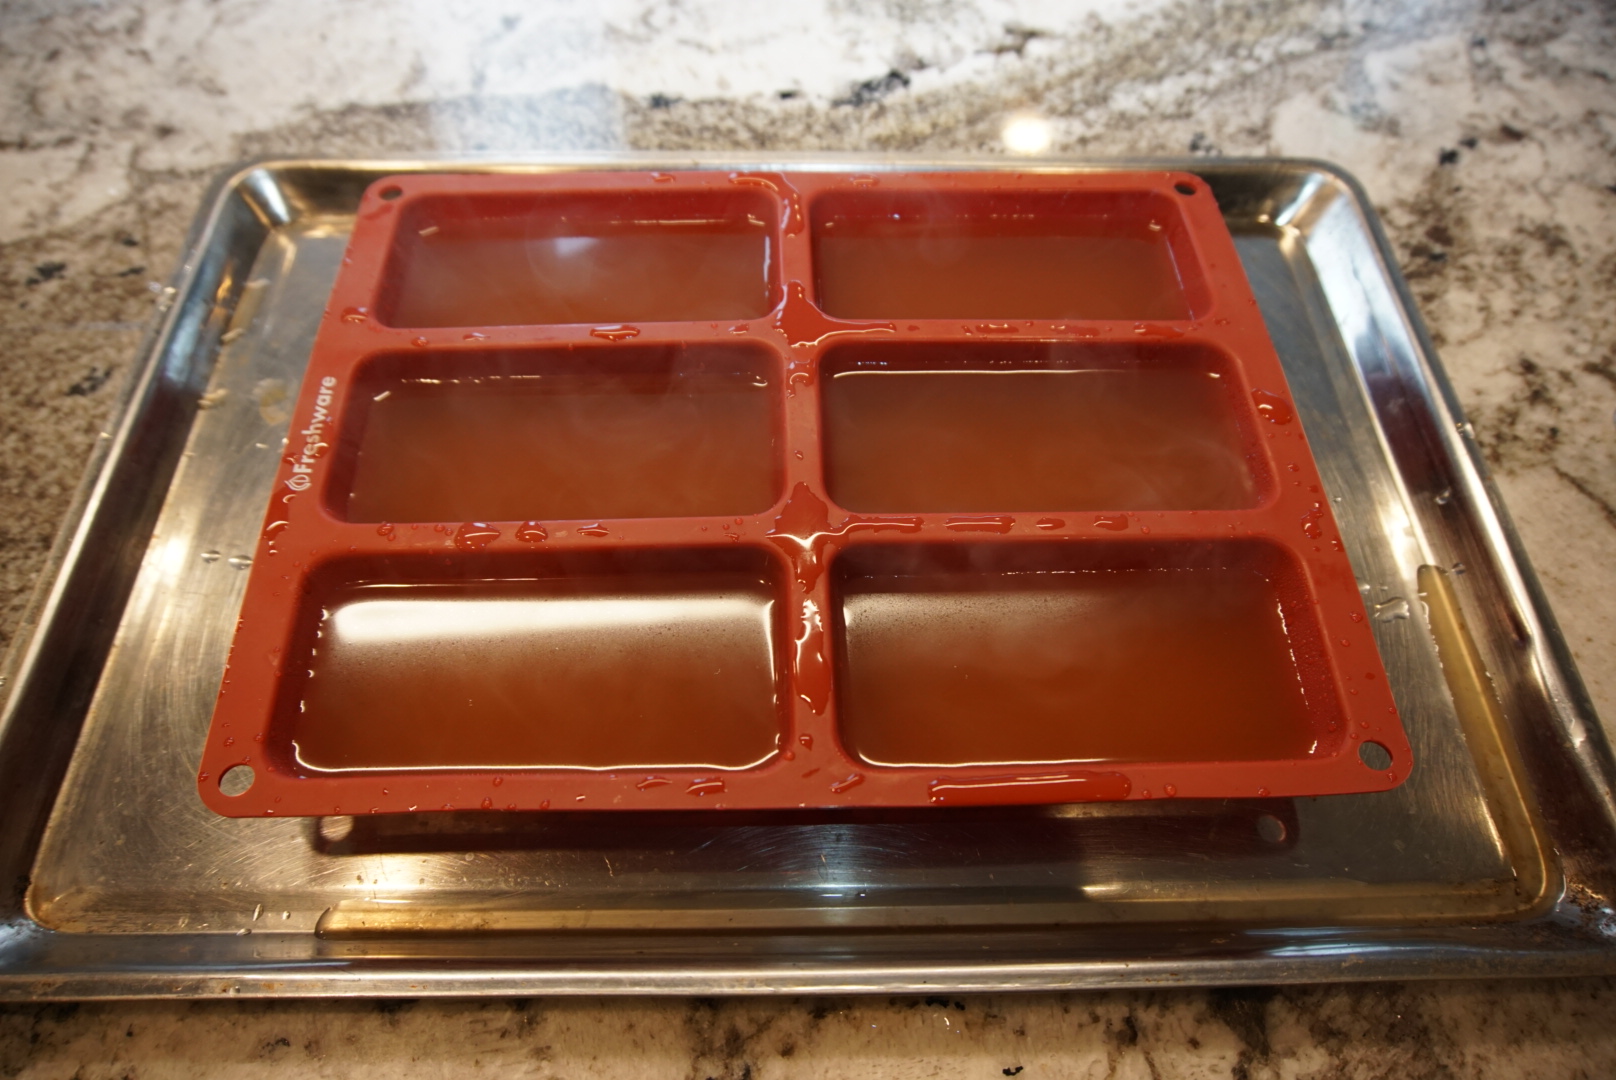
7.If you aren’t going to consume the broth in the next week, it freezes really well. You can freeze it in freezer jars. I like to simmer broth on the stove if I am going to freeze it because it reduces the volume by about half, so it takes up less room in the freezer (freezer space is at a premium in our house after hunting and fishing season). After it has reduced I pour it into silicon molds. I like these molds (I actually own two sets) because they are a great individual serving size and they are the same ones I bake personal frittatas in, but that is for another post. Once the broth is frozen I move it to Zip-Lock freezer bags for longer-term storage. When you defrost your broth, just add water to restore your original quantity.
About Gina
Gina Ciolkosz is a Personal Cook and Health Coach living in Anchorage, Alaska. She has a Bachelor’s of Science in Physiology and is an American Council on Exercise certified Health Coach. For the past six years, she has lived in Alaska, where she can’t get enough of the active Alaskan lifestyle that for her includes hunting, fishing, hiking, and the occasional weekend race. She loves to cook for people and enjoys the challenge of making healthy food taste delicious. Open Sky Fitness Podcast was the first podcast she found which helped her realize she wanted to work in the health and wellness industry.
Check her out at Wild and Well Fed and follow her on Instagram
We are a participant in the Amazon Services LLC Associates Program, an affiliate advertising program designed to provide a means for us to earn fees by linking to Amazon.com and affiliated sites